FFmpeg Commands Cheatsheet
[This Post will be getting updated whenever possible and necessary.]
Below are a selection of commands that I have found most useful for my needs. A good rule of thumb is, if you don’t understand the sequence of commands in a line, better not run it. Start with the simpler ones in the beginning.
Note: For quicker targeting, open a terminal in the file’s location; instead of typing the change directory command “cd” along with the location. Text highlighted with orange and light green can be replaced for choosing the files you prefer, and the values alike. Though, keep in mind, file names with spaces and/or special characters might not be accepted and result in an error. You can rename them to something simpler temporarily for the sake of the operation, and after, back to your liking. If you have many files, another option is to duplicate them, and so you’ll only have to deal with renaming them once.
FFmpeg Version I use: 6.1.1-1~mx23+1
Source: MX Package Installer, MX Test Repo
📜 Help & About Commands
• Display Info About the Installed Version:
ffmpeg• Display Help:
ffmpeg -h🪄 Increase Video Frame Rate
• With Motion Interpolation:
ffmpeg -i input_video.mp4 -filter:v minterpolate -r 30 output_video.mp4
• With Frame Blending:
ffmpeg -i input_video.mp4 -filter:v tblend -r 30 output_video.mp4
• [High Quality] Interpolation Example:
(-crf 14: This option sets the Constant Rate Factor (CRF) for the output video. The CRF value controls the quality of the output video. A lower CRF value results in higher quality and larger file sizes. The range typically goes from 0 (lossless) to 51 (lowest quality), with 18-23 being a common range for good quality.)
ffmpeg -i input_video.mp4 -filter:v "minterpolate='fps=30:mi_mode=mci:me_mode=bidir'" -crf 14 output_video.mp4
⏱️ Reduce Frame Rate
• Set Frame Rate:
(2*PTS: This means that the timestamps will be doubled, effectively slowing down the video to half its original speed. -r 4: This option sets the frame rate of the output video.)
ffmpeg -i input_video.mp4 -filter:v "setpts=2*PTS" -r 4 output_video.mp4
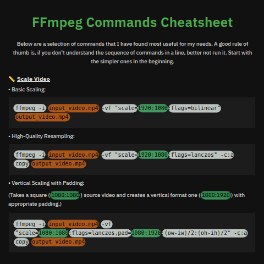
📏 Scale Video
• Basic Scaling:
ffmpeg -i input_video.mp4 -vf "scale=1920:1080:flags=bilinear" output_video.mp4
• High-Quality Resampling:
ffmpeg -i input_video.mp4 -vf "scale=1920:1080:flags=lanczos" -c:a copy output_video.mp4
• Vertical Scaling with Padding:
(Takes a square ( 1080:1080 ) source video and creates a vertical format one ( 1080:1920 ) with appropriate padding.)
ffmpeg -i input_video.mp4 -vf "scale=1080:1080:flags=lanczos,pad=1080:1920:(ow-iw)/2:(oh-ih)/2" -c:a copy output_video.mp4
🖼️ Images to Video 🎥
• Convert Images to Video:
(-pattern_type glob: This option tells FFmpeg to use glob pattern matching for input file names. It allows you to specify a pattern to match multiple files. The *.jpeg pattern means that FFmpeg will look for all files in the current directory that have the .jpeg extension. -pix_fmt yuv420p sets the pixel format for the output video.)
ffmpeg -r 7.5 -pattern_type glob -i '*.jpeg' -pix_fmt yuv420p output_video.mp4
📸 Frame Extraction From a Video File 🎞️
• Extract the First Frame:
(-q:v 3: This is the quality level, where lower numbers indicate higher quality. The range typically goes from 1 (highest quality) to 31 (lowest quality).
ffmpeg -i input_video.mp4 -vf "select=eq(n\,0)" -q:v 3 output_image.png
• Extract a Specific Frame:
ffmpeg -i input_video.mp4 -vf "select=eq(n\,150)" -q:v 3 output_frame.png
• Extract a Frame at a Specific Time:
ffmpeg -i input_video.mp4 -ss 00:00:10 -vframes 1 -q:v 3 output_frame.png
• Extract all the Frames from a Video:
(%04d is a format specifier that tells FFmpeg to create a sequence of output files with a four-digit number. For example, the first output file will be named 0001.png, the second 0002.png, and so on.)
ffmpeg -i input_video.mp4 %04d.png
🎶 Merge Audio & Video 🎥
• Combine Audio and Video Files:
ffmpeg -i input_video.mp4 -i input_audio.mp3 -c:v copy -c:a aac -strict experimental output_video.mp4
🎬 Images to GIF 🎞️
• Convert Images to animated GIF:
(-f image2: This option specifies the input format, which in this case is a sequence of images. -i thumb/%001d.jpg: Is where the input file pattern is defined. The thumb/%001d.jpg indicates that FFmpeg will look for image files in the thumb directory, using a zero-padded numbering format (e.g., thumb/000.jpg, thumb/001.jpg, etc.).)
ffmpeg -f image2 -framerate 10 -i thumb/%001d.jpg -vf scale=480x240 output_gif.gif
🖼️ Image Overlay
• Top-Left Corner Overlay:
(The first 0 is the x-coordinate (horizontal position) from the left.
The second 0 is the y-coordinate (vertical position) from the top.
So, overlay=0:0 means the overlay image will be placed at the top-left corner of the video.)
ffmpeg -i input_video.mp4 -i overlay_image.png -filter_complex "overlay=0:0" -c:a copy output_video.mp4
• Center Overlay:
(By using (W-w)/2 for the x-coordinate and (H-h)/2 for the y-coordinate, the overlay image will be centered on the video.)
ffmpeg -i input_video.mp4 -i overlay_image.png -filter_complex "overlay=(W-w)/2:(H-h)/2" -c:a copy output_video.mp4
🔄 Video Loop 🎥
• Loop Video:
(-stream_loop 9: This loops the input video 9 additional times, resulting in a total of 10 loops ,1 original + 9 loops).
ffmpeg -stream_loop 9 -i input_video.mp4 -c copy output_longer_video.mp4
✨ Video Noise Reduction
• Apply Noise Reduction:
(-vf: This flag stands for “video filter.” It allows you to apply various filters to the video.
hqdn3d: This is a high-quality denoise filter that reduces noise in the video.
The parameters 1.5:1.5:6:6 represent:
The first two values (1.5) are the luma (brightness) and chroma (color) spatial radius.
The last two values (6:6) are the luma and chroma temporal radius, which control how much noise reduction is applied over time. -c:a: This flag specifies the codec for the audio stream.
copy: This means that the audio stream will be copied from the input file without any re-encoding, preserving the original audio quality.)
ffmpeg -i input_video.mp4 -vf "hqdn3d=1.5:1.5:6:6" -c:a copy output_video.mp4


Leave a comment